如何批量取消訂閱 YouTube 頻道,使用 YouTube Subscriptions API
這篇文章將帶領大家透過一個實際案例,使用 Google YouTube API、OAuth、Svelte 和 TailwindCSS 建立一個簡單、方便的工具來批量取消訂閱 YouTube 頻道。
原因
像我這樣,訂閱了上百個 YouTube 頻道,卻發現大多數時間都在滑過不看的內容,這不僅分散注意力,也減少了尋找有趣內容的效率。
土法煉鋼一個一個點頻道退訂,大概退了一二十個頻道後,終於還是受不了,這樣點真的很累。YouTube 的管理介面對於批量操作真不友好,搜尋很多網路解法,並沒有找到方便好用又快速的方式。
不如自己來寫個工具,構想大概就用個簡單頁面顯示我的訂閱,然後使用 YouTube API 刪除挑選的訂閱。查看一下 Google 文件,果然有簡單的 API 可以用,那就開始吧。
開發計畫
任何開發計畫第一件事,一定是把本機開發環境弄好,讓開發節奏順暢。
預計使用 SvelteKit 開發一個純網頁的前端應用,不需要後端 Server,只需要能呼叫 YouTube API 就行。
應該會需要使用 OAuth 授權,才能取得訂閱頻道清單。
畫面要簡單也不能太醜,TailwindCSS 能快速解決。
準備 Google API
要使用 Google API,首先需要在 Google Cloud Platform 上建立一個新的專案,然後在該專案中啟用 YouTube Data API v3。
建立新專案
登入 Google Cloud Console,建立一個新專案。
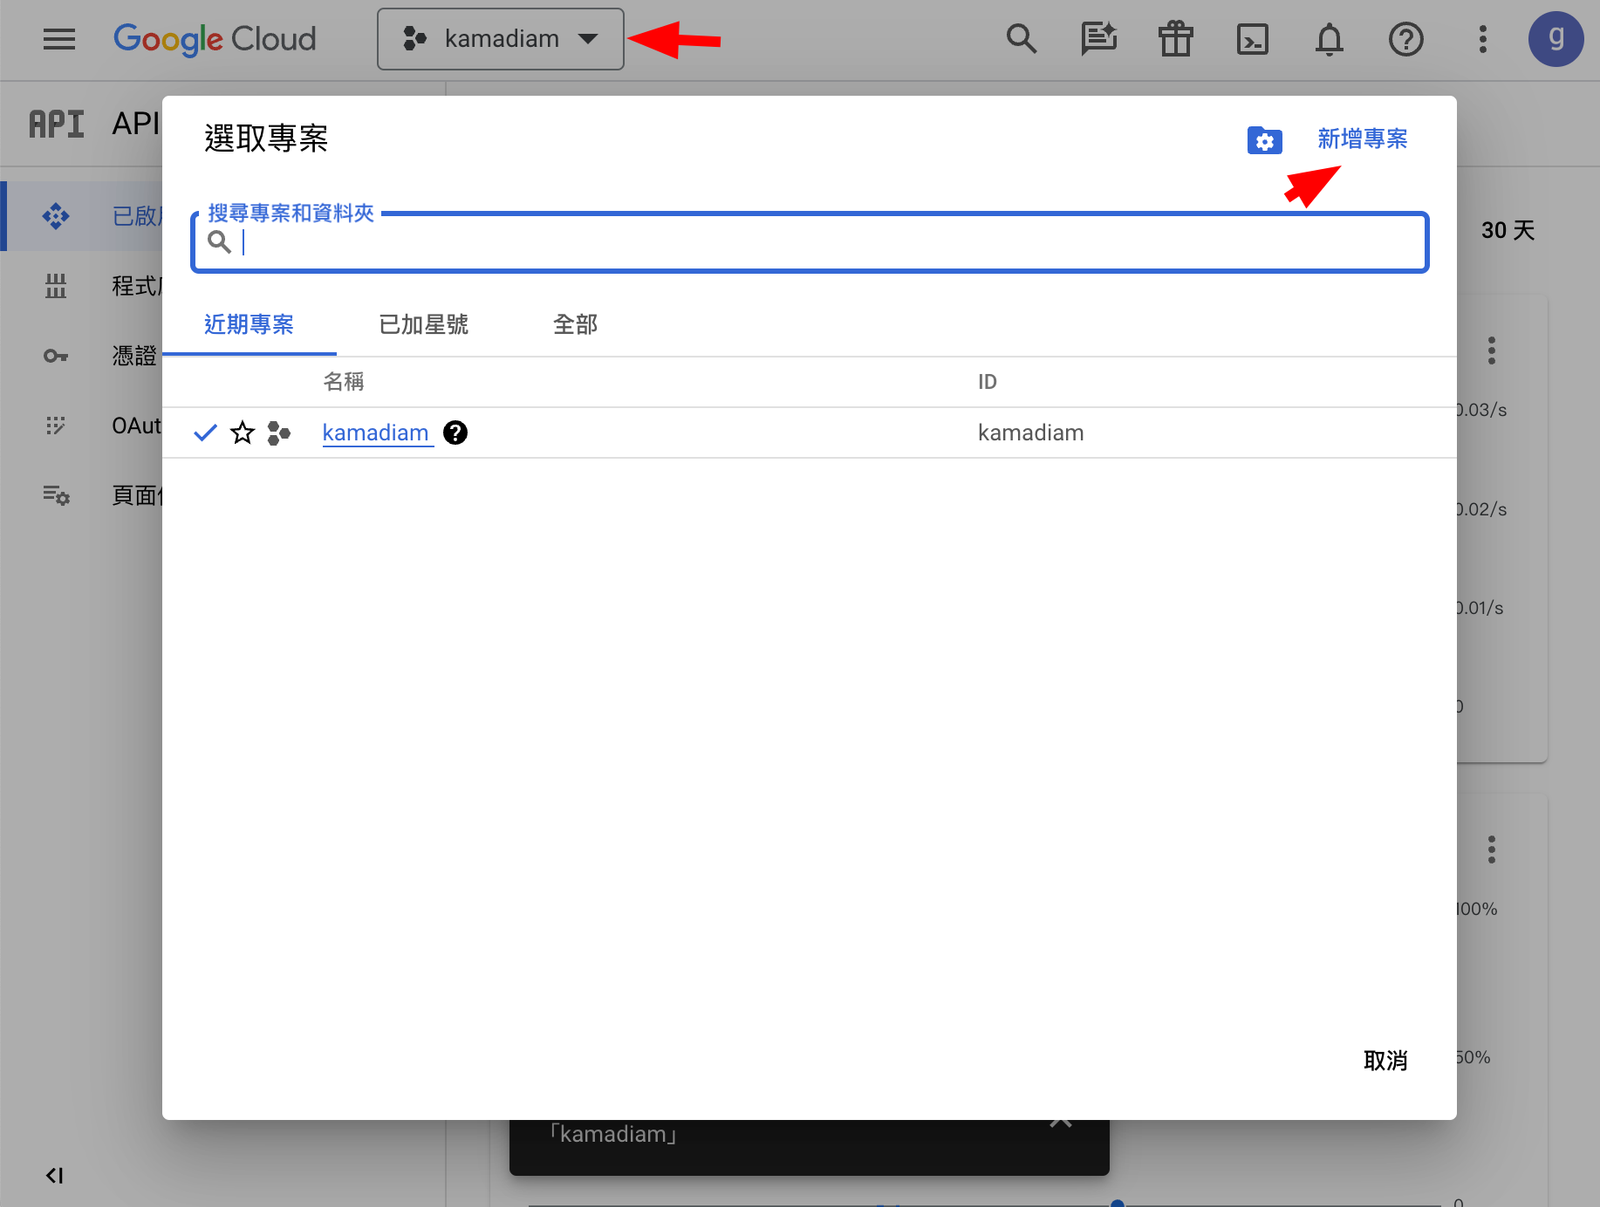
在建立的專案中,導航到「API 與服務」>「啟用 API 和服務」。

搜尋並選擇「YouTube Data API v3」,然後啟用它。
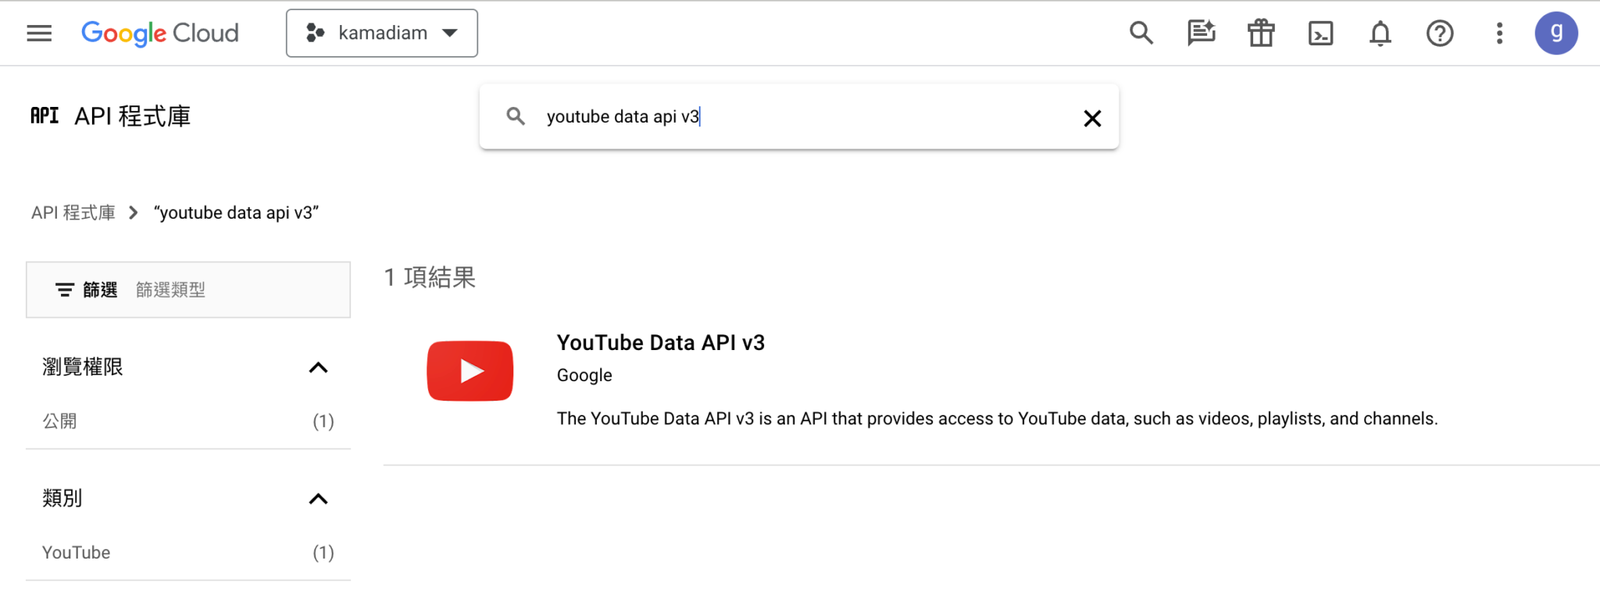
OAuth 設定
在相同的專案中,建立憑證,以便存取已啟用的 API。

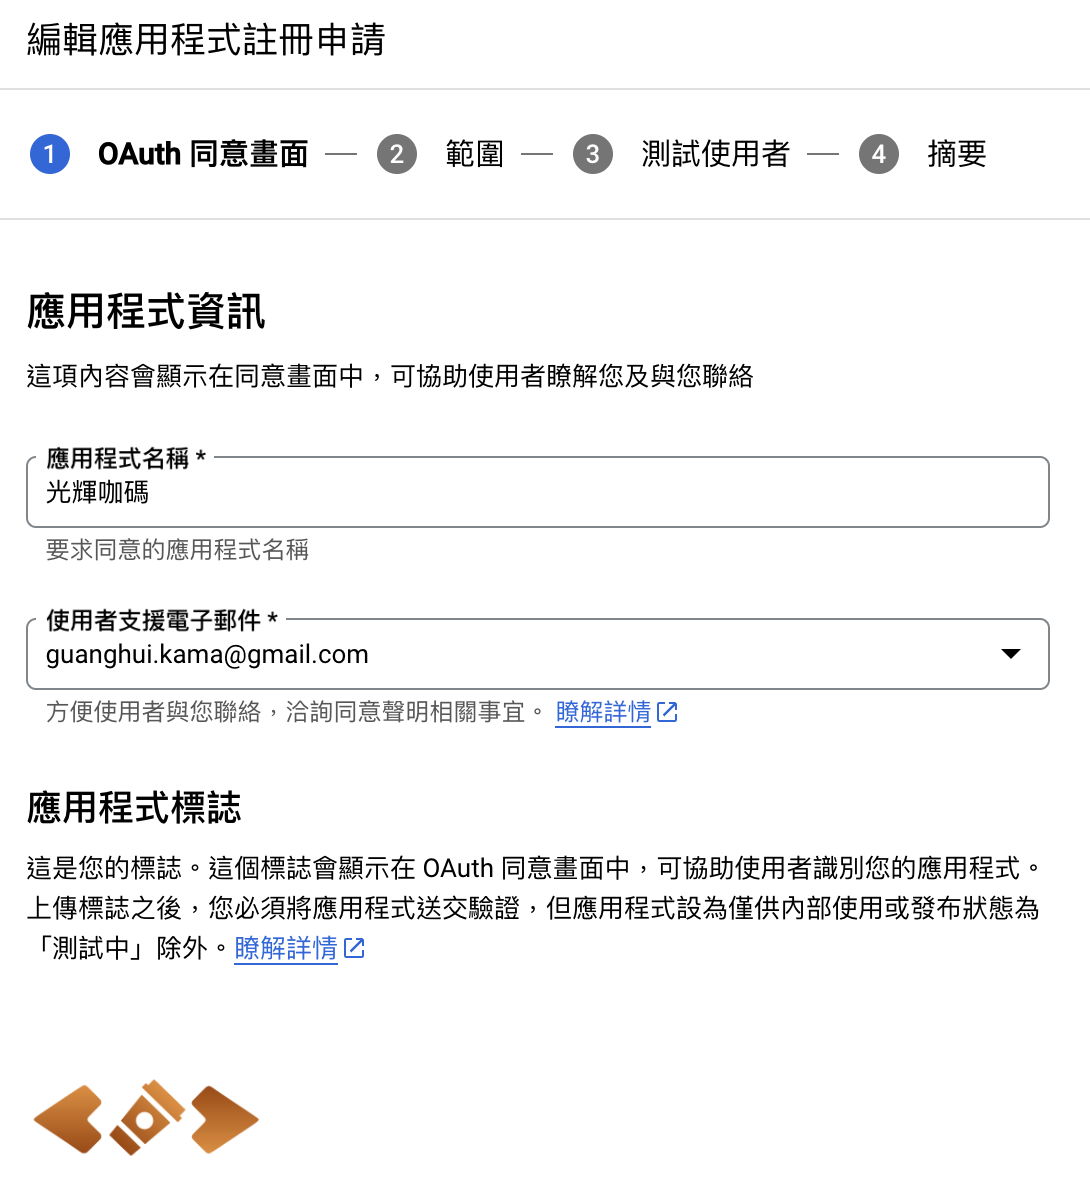
設置 OAuth 同意畫面,提供必要的應用資訊。
在 OAuth 用戶端設置中,新增授權的重定向 URI,這將用於 OAuth 流程。
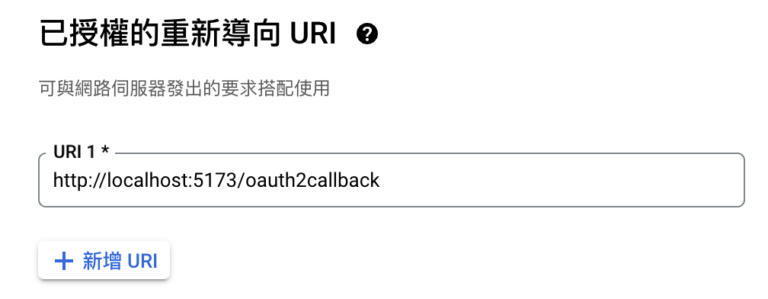
這是本機的測試 callback 網址,可以新增 URI 分別對應不同執行環境。
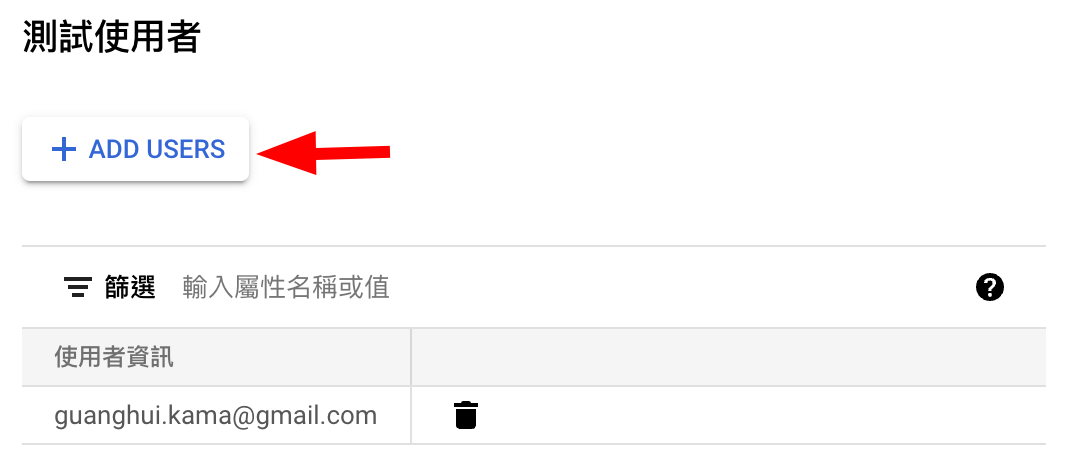
這個專案需要額外授權,所以需要經過 Google 審核,不然就只能自己使用,或者設定測試人員,分享給別人使用,最多 100 個人。
SvelteKit 初始專案
使用以下命令來建立一個新的 SvelteKit 專案:
pnpm create svelte@latest youtube-app這將建立一個基礎的 SvelteKit 專案,你可以開始新增自己的程式碼。
code .使用 Visual Studio Code 開啟專案。
TailwindCSS 美化介面
為了快速而美觀地構建 UI,這裡將使用 TailwindCSS。以下是整合 TailwindCSS 的步驟:
安裝 tailwindcss 及其相關依賴項目:
pnpm install -D tailwindcss postcss autoprefixer然後產生 tailwind.config.js 和 postcss.config.js 檔案:
pnpm dlx tailwindcss init -p安裝 DaisyUI(一個基於 Tailwind 的組件庫):
pnpm i -D daisyui@latest修改 svelte.config.js
import adapter from '@sveltejs/adapter-auto';
import { vitePreprocess } from '@sveltejs/vite-plugin-svelte';
/** @type {import('@sveltejs/kit').Config} */
const config = {
  kit: {
    adapter: adapter()
  },
  preprocess: vitePreprocess()
};
export default config;
修改 tailwind.config.js
/** @type {import('tailwindcss').Config} */
export default {
  content: ['./src/**/*.{html,js,svelte,ts}'],
  theme: {
    extend: {},
  },
  plugins: [require("daisyui")],
}
建立一個 ./src/app.css 檔案
@tailwind base;
@tailwind components;
@tailwind utilities;
建立 ./src/routes/+layout.svelte 檔案並匯入新建立的 app.css 檔案:
<script>
  import "../app.css";
</script>

<slot />第一個畫面
萬事俱備,先啟動 Server 看看
pnpm dev
接下來建立一個簡單的登入頁面,允許使用者透過 Google 認證來登入。使用剛剛設定的 OAuth 設定來實現這一點。
修改 ./src/routes/+page.svelte
<script lang="ts">
  // 重定向 URI, 在 OAuth 驗證流程中使用
  const redirect_uri = 'http://localhost:5173/oauth2callback'
  // 替換你自己的 client_id
  const client_id = 'your_client_id'

  /*
   * 創建表單以從 Google 的 OAuth 2.0 伺服器請求 access token。
   */
  function oauthSignIn() {
    // Google 的 OAuth 2.0 端點,用於請求 access token
    var oauth2Endpoint = "https://accounts.google.com/o/oauth2/v2/auth";

    // 創建 <form> 元素,提交參數到 OAuth 2.0 端點。
    var form = document.createElement("form");
    form.setAttribute("method", "GET"); // 以 GET 請求發送。
    form.setAttribute("action", oauth2Endpoint);

    interface Params {
      [key: string]: string;
    }

    // 傳遞給 OAuth 2.0 端點的參數。
    var params: Params = {
      client_id,
      redirect_uri,
      response_type: "token",
      scope: "https://www.googleapis.com/auth/youtubepartner",
    };

    // 將表單參數添加為隱藏的輸入值。
    for (var p in params) {
      var input = document.createElement("input");
      input.setAttribute("type", "hidden");
      input.setAttribute("name", p);
      input.setAttribute("value", params[p]);
      form.appendChild(input);
    }

    // 將表單添加到頁面並提交,以打開 OAuth 2.0 端點。
    document.body.appendChild(form);
    form.submit();
  }
</script>

<h1 class="text-3xl m-4">Mass Unsubscribe YouTube</h1>
<p>
  <button class="btn btn-warning" on:click={oauthSignIn}>使用 Google 帳號登入</button>
</p>
頻道管理介面
接下來將新增一個頁面來展示使用者的 YouTube 頻道訂閱列表,並允許他們選擇要取消訂閱的頻道。
修改 ./src/routes/oauth2callback/+page.svelte
<script lang="ts">
  import { onMount } from "svelte";
  import { page } from "$app/stores";

  // 從 URL 字串中解析出存取令牌
  function getAccessTokenFromString(str: string) {
    const regex = /#access_token=([^&]*)/;
    const match = str.match(regex);
    return match ? match[1] : null;
  }

  // 取得當前頁面 URL 的存取令牌
  const accessToken = getAccessTokenFromString($page.url.hash);

  // 這裡放置你的 API 金鑰
  const key = 'key'

  // 存放訂閱頻道的陣列
  let subscriptions: any[] = [];

  // 頁面載入時執行
  onMount(() => {
    // 從 YouTube API 取得訂閱頻道
    fetch(
      `https://youtube.googleapis.com/youtube/v3/subscriptions?part=snippet&mine=true&key=${key}&maxResults=50`,
      {
        method: "GET",
        headers: {
          Authorization: "Bearer " + accessToken,
        },
      },
      )
      .then((response) => {
        console.log(response);
        return response.json();
      })
      .then((data) => {
        subscriptions.push(...data.items);
        subscriptions = [...subscriptions];
        return nextPage(data.nextPageToken);
      })
      .catch((error) => {
        console.log(error);
      });
  })

  // 處理分頁,取得更多訂閱頻道
  function nextPage(token: string) {
    if (token) {
      console.log(token);
      fetch(
        `https://youtube.googleapis.com/youtube/v3/subscriptions?part=snippet&mine=true&key=${key}&maxResults=50&pageToken=${token}`,
        {
          method: "GET",
          headers: {
            Authorization: "Bearer " + accessToken,
          },
        },
      )
        .then((response) => {
          console.log(response);
          return response.json();
        })
        .then((data) => {
          subscriptions.push(...data.items);
          subscriptions = [...subscriptions];
          return nextPage(data.nextPageToken);
        })
    }
  }

  // 取消訂閱指定的頻道
  function unsubscribe(id: string) {
    fetch(
        `https://youtube.googleapis.com/youtube/v3/subscriptions?id=${id}`,
        {
          method: "DELETE",
          headers: {
            Authorization: "Bearer " + accessToken,
          },
        },
      )
        .then((response) => {
          console.log(response);
          if(response.status == 204) {
            subscriptions = subscriptions.filter((sub) => sub.id != id)
          }
        })
  }

  // 取消訂閱所有頻道
  function unsubscribeAll() {
    if (window.confirm("Do you really want to unsubscribe all channels?")) {
      let i = 0
      subscriptions.forEach((sub) => {
        setTimeout(() => {
          unsubscribe(sub.id)
          console.log(`unsubscribe ${sub.snippet.title}`);
        }, 2000 * i);
        i++
      })
    }
  }
</script>

  <h1 class="text-center text-4xl mt-4">You have {subscriptions.length} subscriptions</h1>

  <ul>

    {#each subscriptions as sub}
    <li class="m-12 border-2 p-4 flex flex-col">
      <a href="https://www.youtube.com/channel/{sub.snippet.resourceId.channelId}" target="_blank" class="self-center">
        <img src="{sub.snippet.thumbnails.default.url}" alt="" class="h-24">
      </a>
      <h2 class="text-center text-xl p-2">{sub.snippet.title}</h2>
      <p>{sub.snippet.description}</p>
      <button class="btn btn-warning mt-2 self-end" on:click={()=>{unsubscribe(sub.id)}}>unsubscribe</button>
    </li>
    {/each}

    <button class="btn btn-error w-full" on:click={unsubscribeAll}>Unsubscribe All</button>
  </ul>
目前為止,這個網頁應用已經開發完成。
參考教學: Using OAuth 2.0 for JavaScript Web Applications
實際測試畫面
因為這是未發布的測試應用程式,需要加入測試帳號才能使用,或者也可以直接發布,一樣可以進行測試。
新增要測試使用的 google 帳號
最多可以新增 100 個。
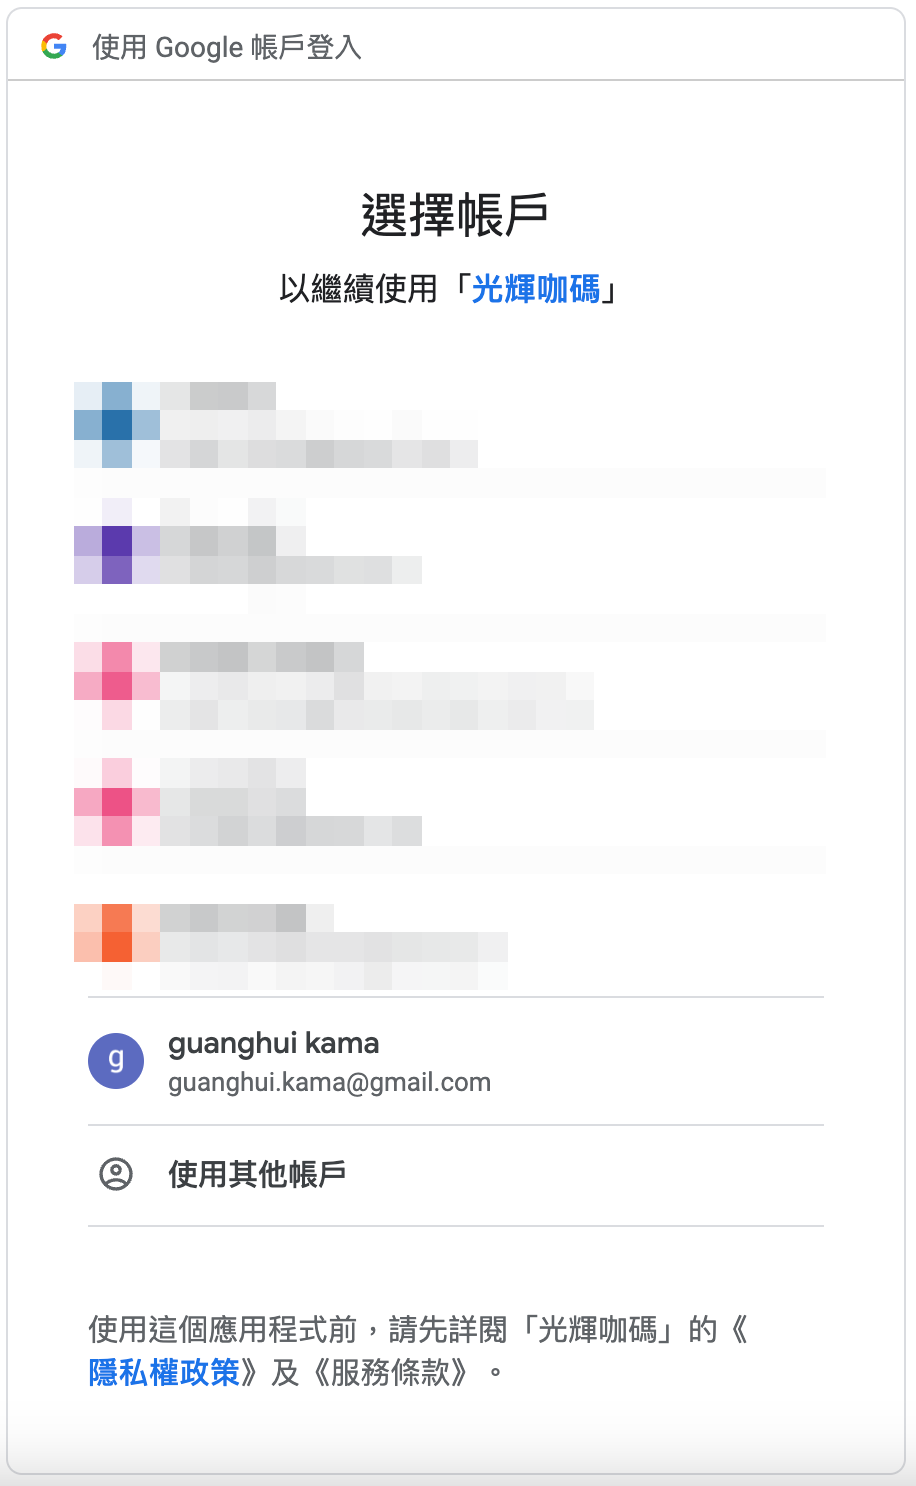
打開本機網址 http://localhost:5173/

選擇帳戶
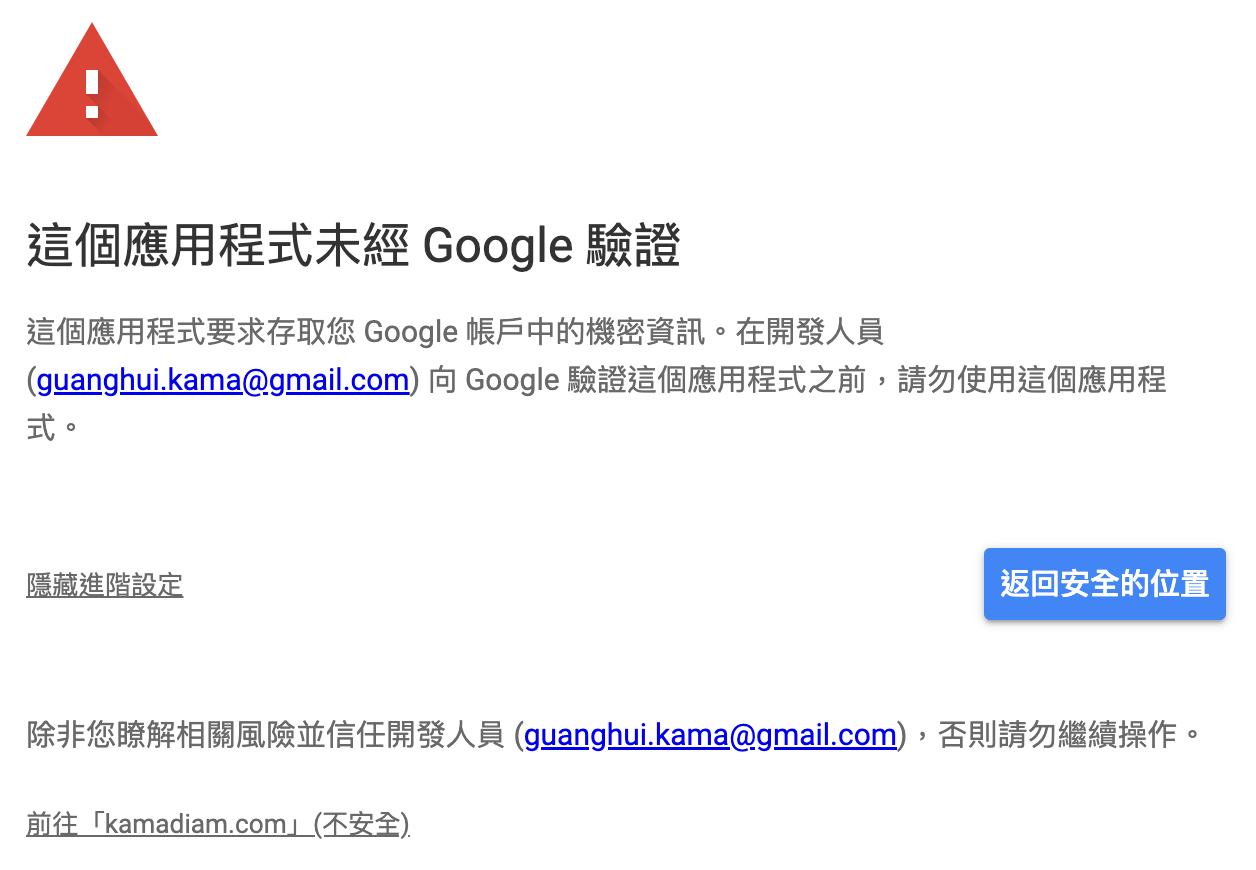
安全驗證
尚未經過 Google 驗證,所以會出現警告訊息,保護使用者資料。
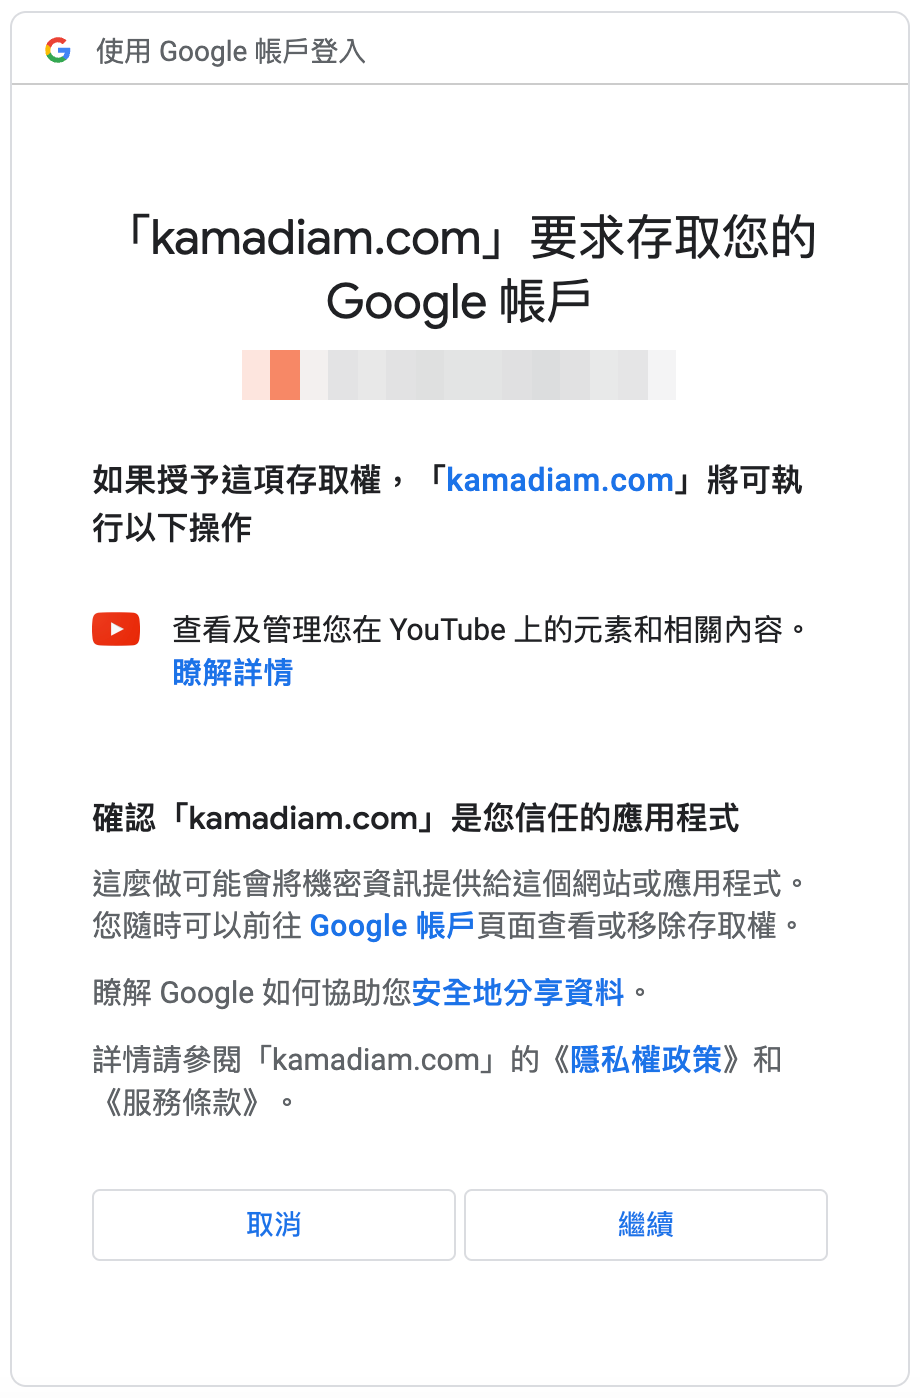
確認授權
查看目前所有訂閱頻道
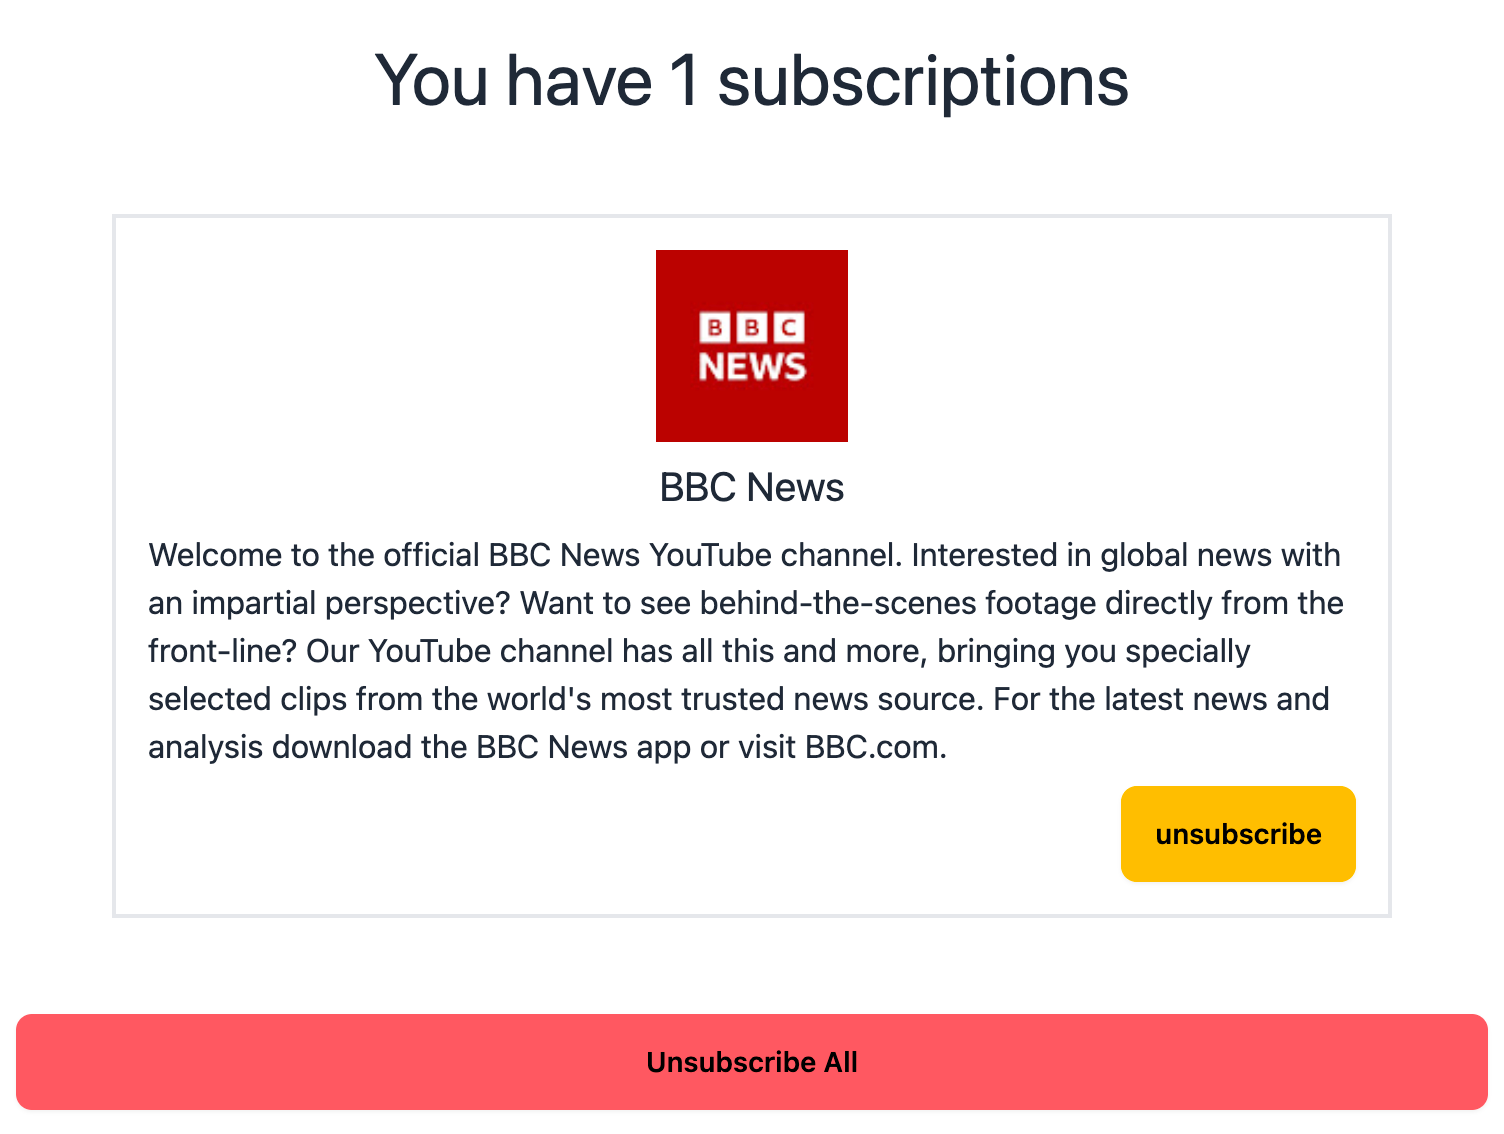
點擊【unsubscribe】就會直接取消訂閱選擇的頻道。
點擊【Unsubscribe All】就會取消訂閱所有的頻道。
如何構建與發布
待續...


